
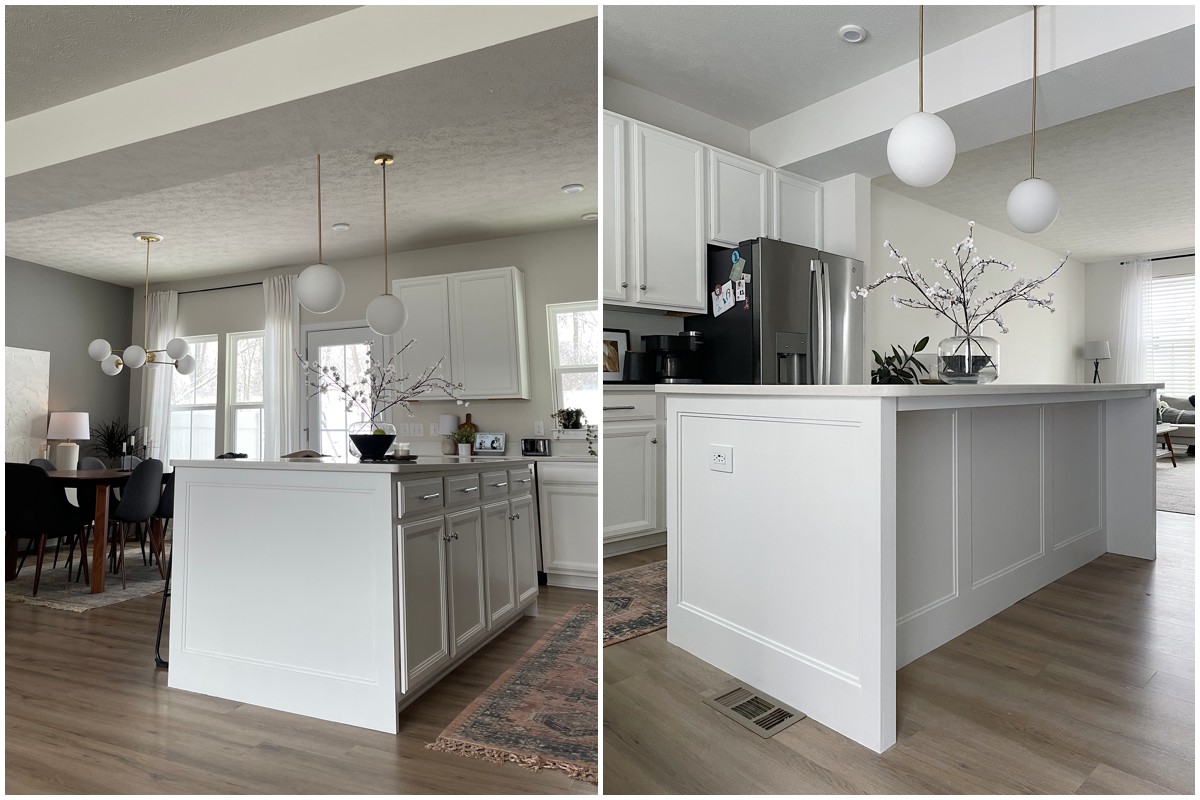
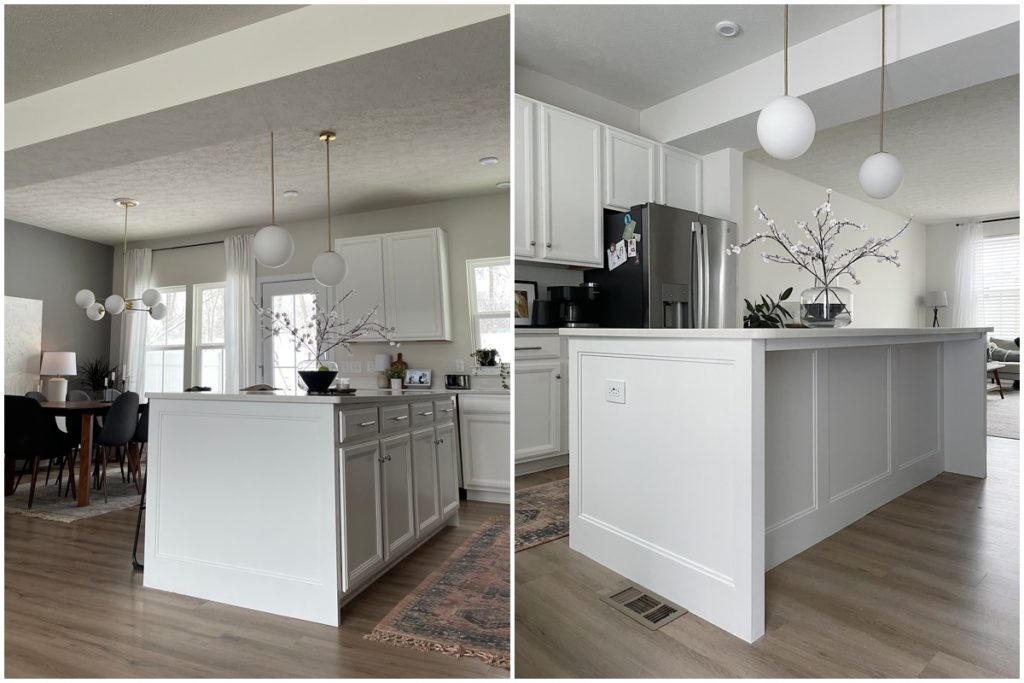
One of my favorite home projects I’ve done so far has to be this DIY kitchen island makeover I recently completed! There are so many things we love about our new home, but there are also so many things we wish we could have upgrade right from the start. One of these home items was the kitchen island. As you can see from the first photo below, there wasn’t much to it! So I decided to strip the island of it’s builder grade materials and completely makeover the kitchen island!
I spent a good amount of time browsing photos on Instagram and Pinterest for inspiration. If there was no budget for the project, I would have easily gone with replacing the countertop all together and doing a marble waterfall…but I guess I’ll save that for our next home! Instead, I decided on doing a simple, yet elegant design that added a couple side panels with some subtle trim. The entire process took about a week, with a majority the word work being complete within the first few days. Feel free to leave a comment below with any questions!
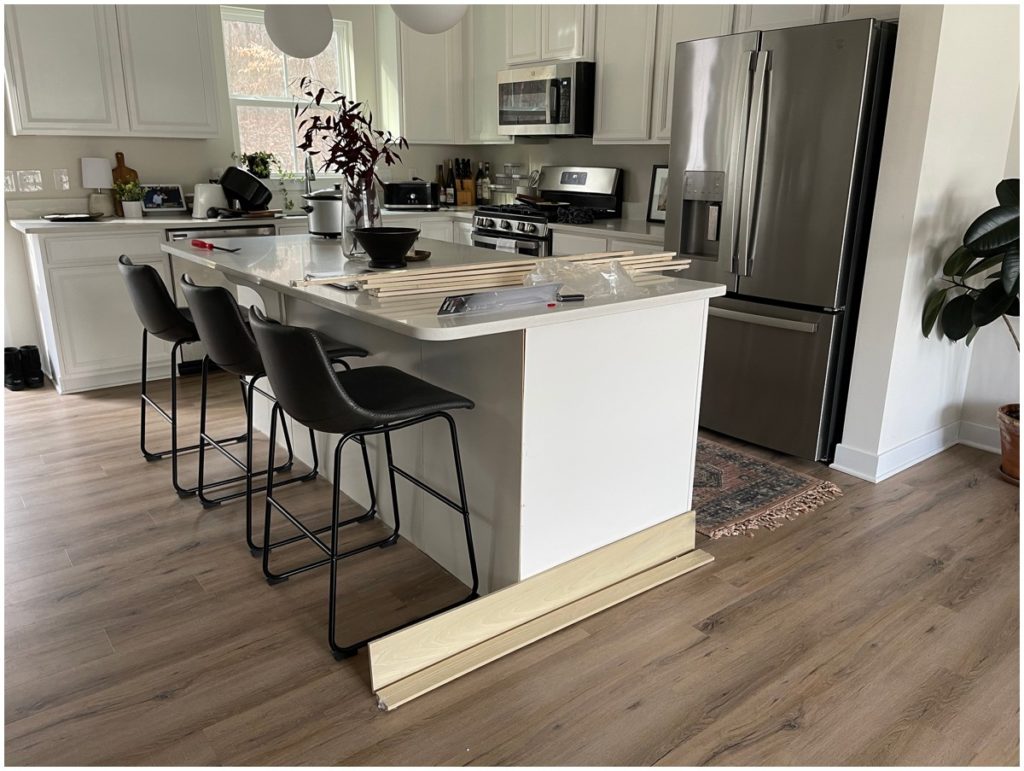
I first began with the side panels. For these, I used 2″x2″ strips of pine. I anchored them into the island with wood screws, and added a 2×2 board across the panels to provide support for the countertop.
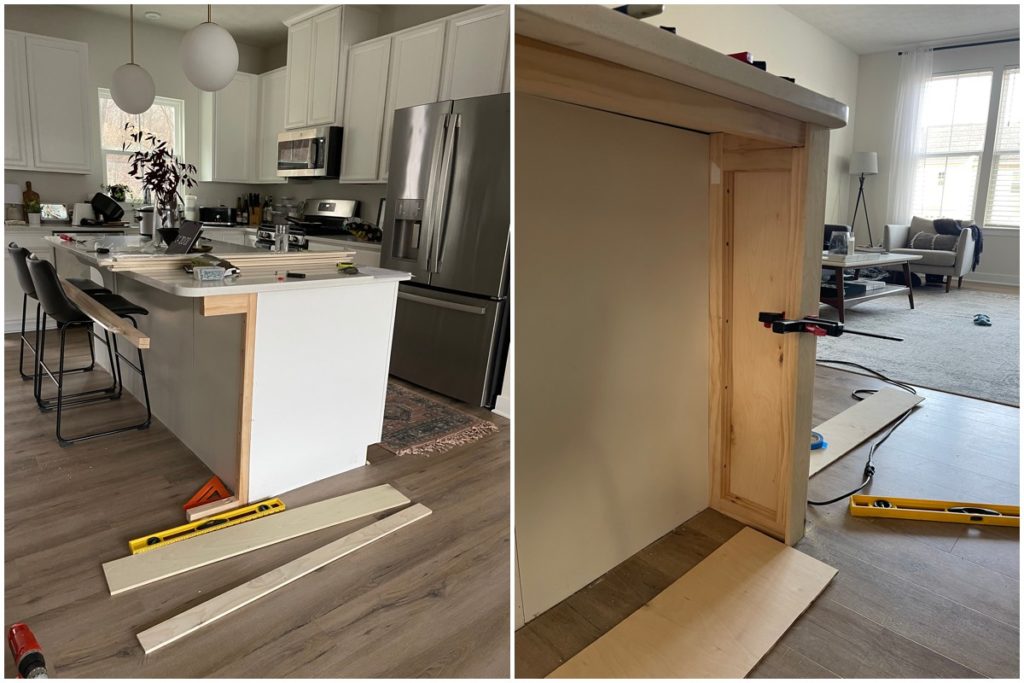
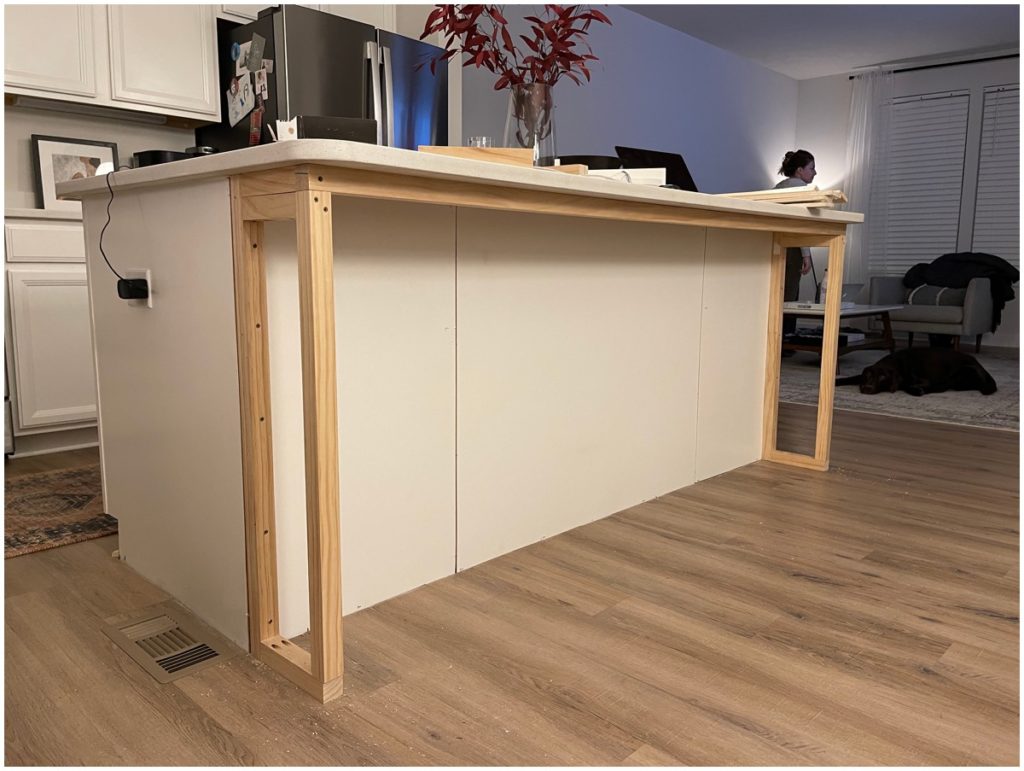
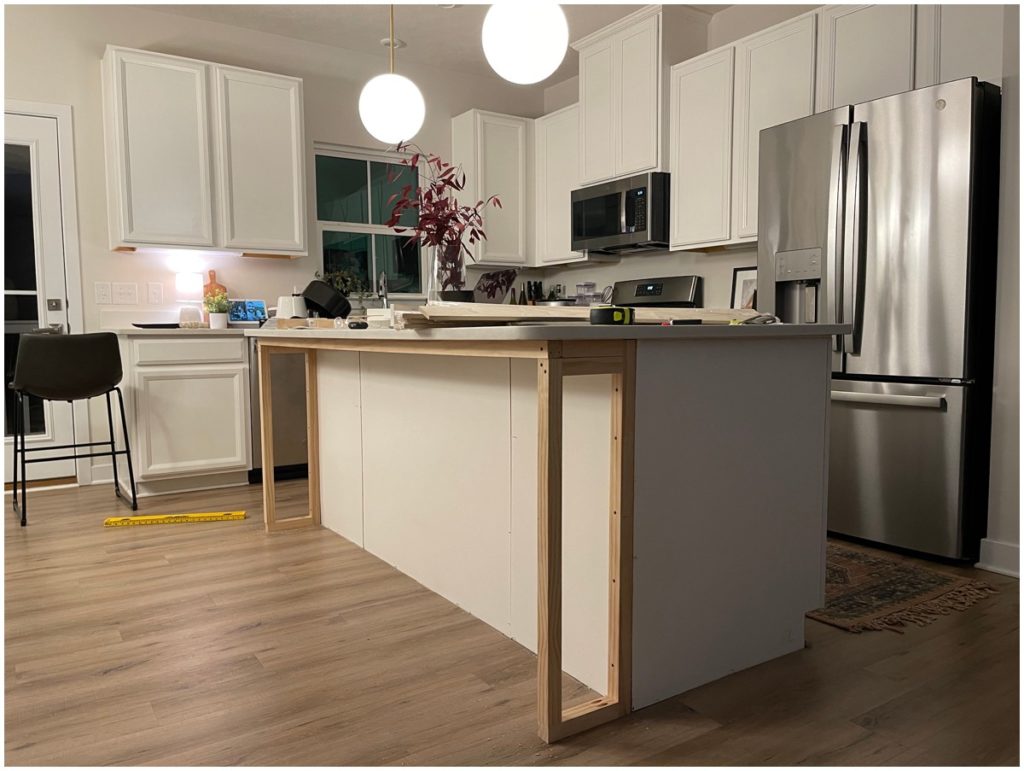
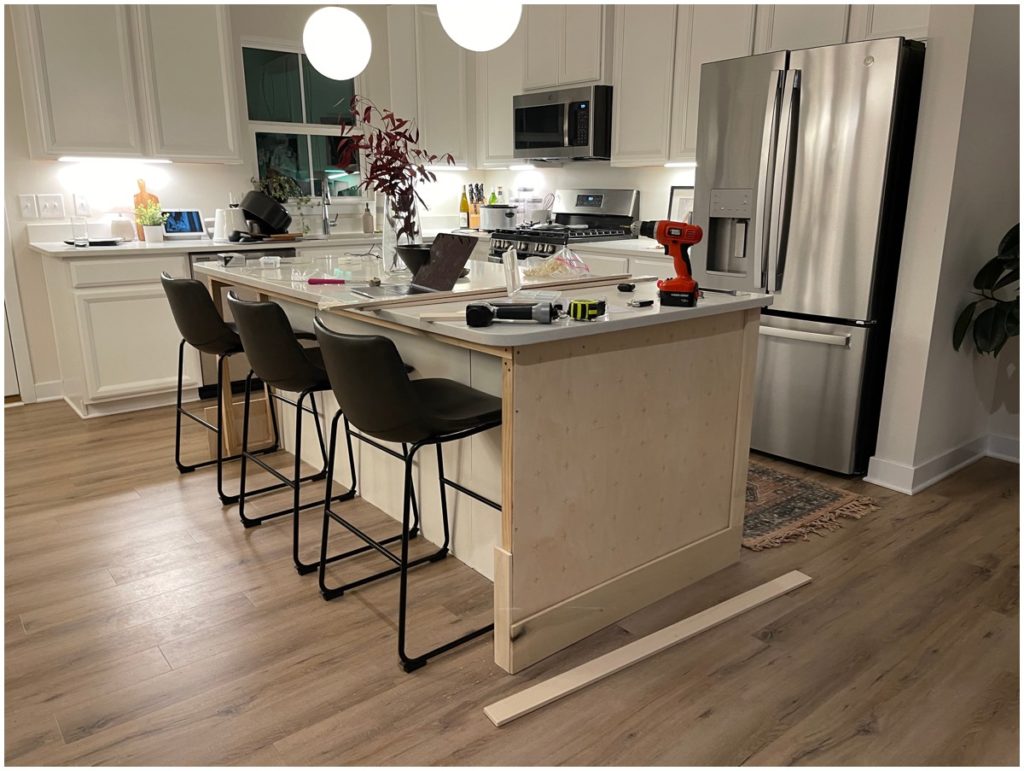
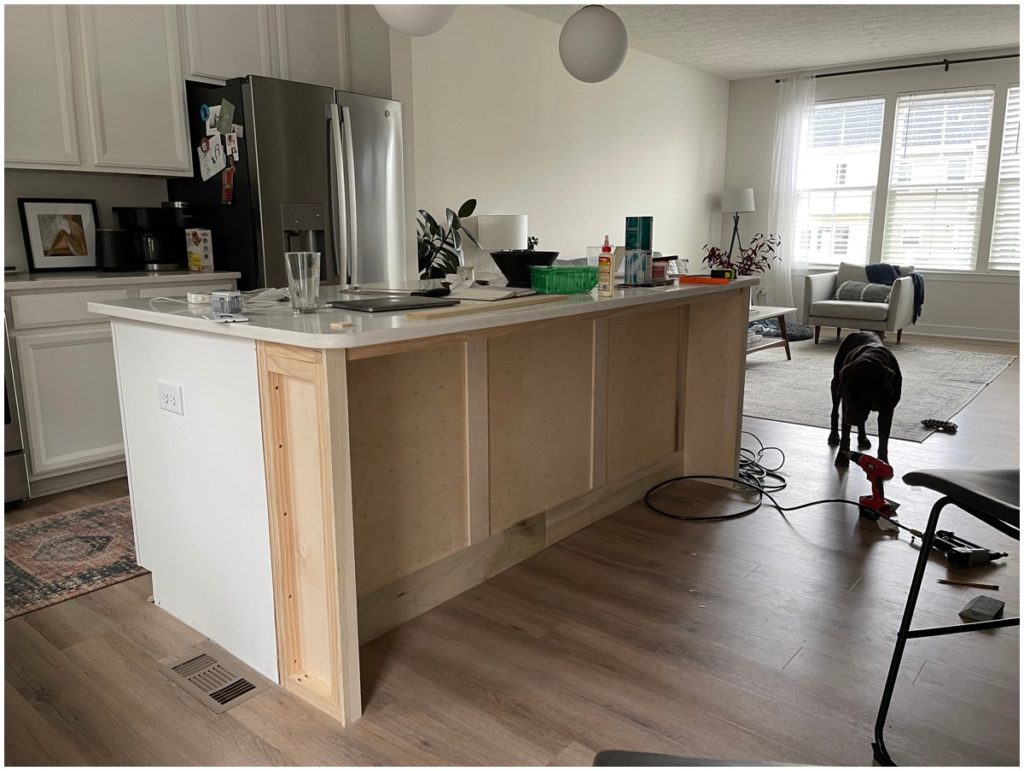
Once the framing for the panels was complete, I covered each side of the island with a 1/4″ piece of plywood. I then started added trim using various sized of poplar.
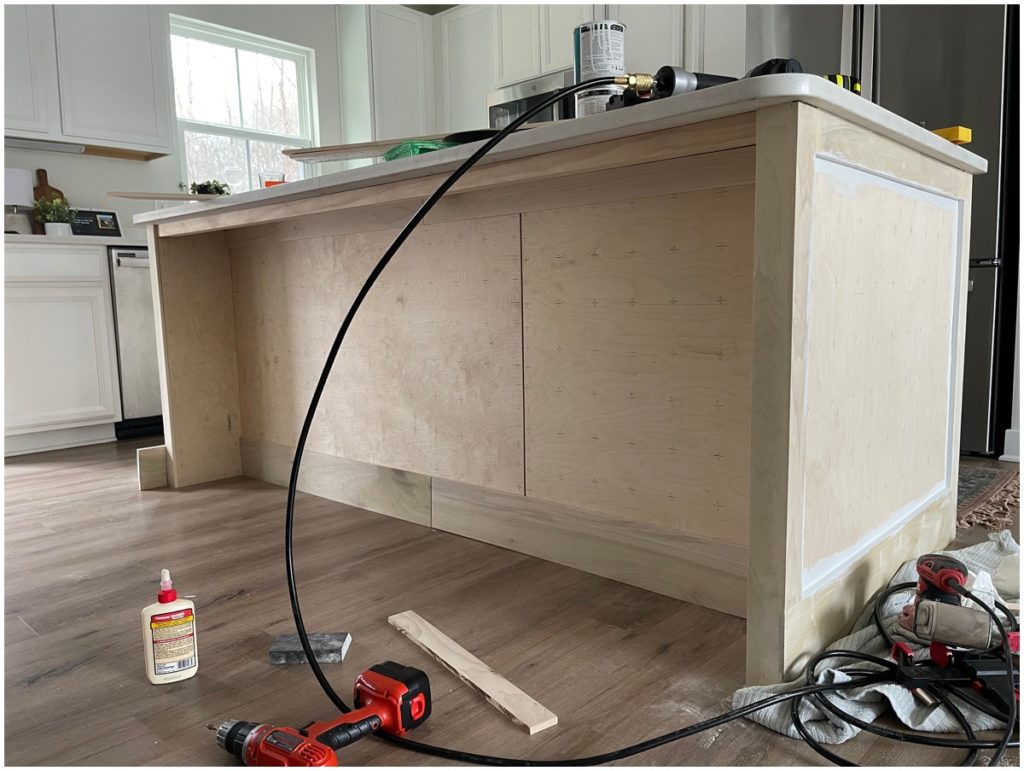
I wanted the island to look completely custom, so I wrapped the plywood completely around the backside of the island. I added the same trim as well.
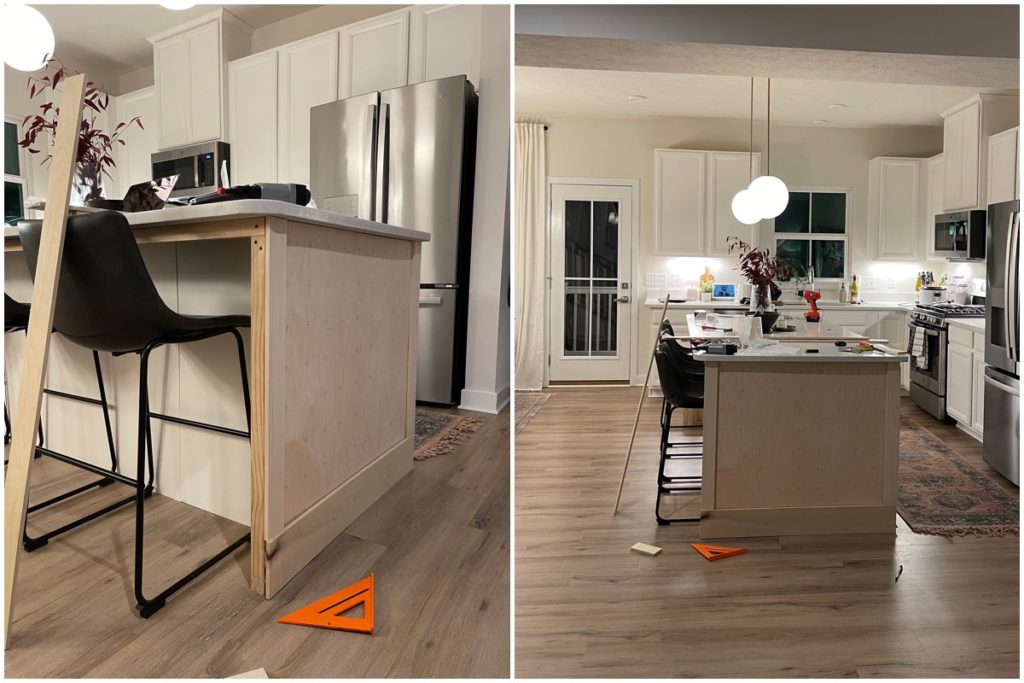
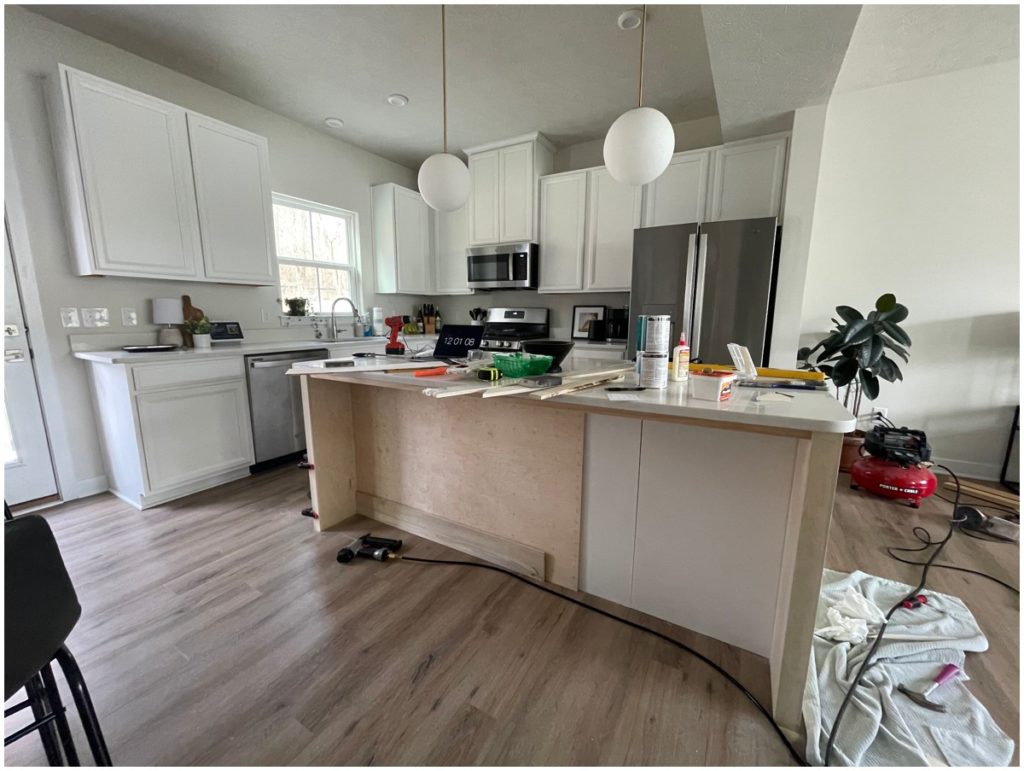
Progress Photos of our DIY kitchen island makeover
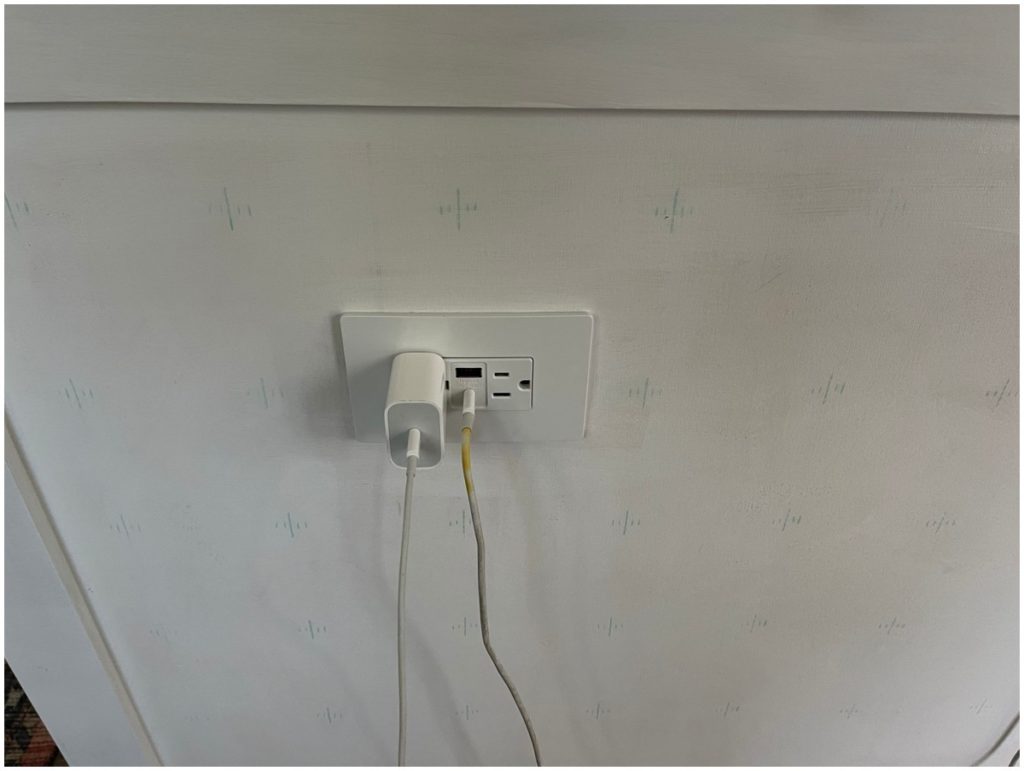
Occasionally, I like to with at the island with my computer and get work done. I added a new outlet that allows me to plug in various USB devices to charge.
I had intended to add 1-1/2″ strips of poplar to the inside of what I had already boxed out. However, I realized it was going to be a pretty difficult job to get proper spacing between the framed trim, so I decided to rip half inch pieces of plywood on the table saw and add those from trim instead. I ended up preferring the look much more as it seemed to look more consistent in design to our cabinets. Had I decide this beforehand, I would not have primed everything first.
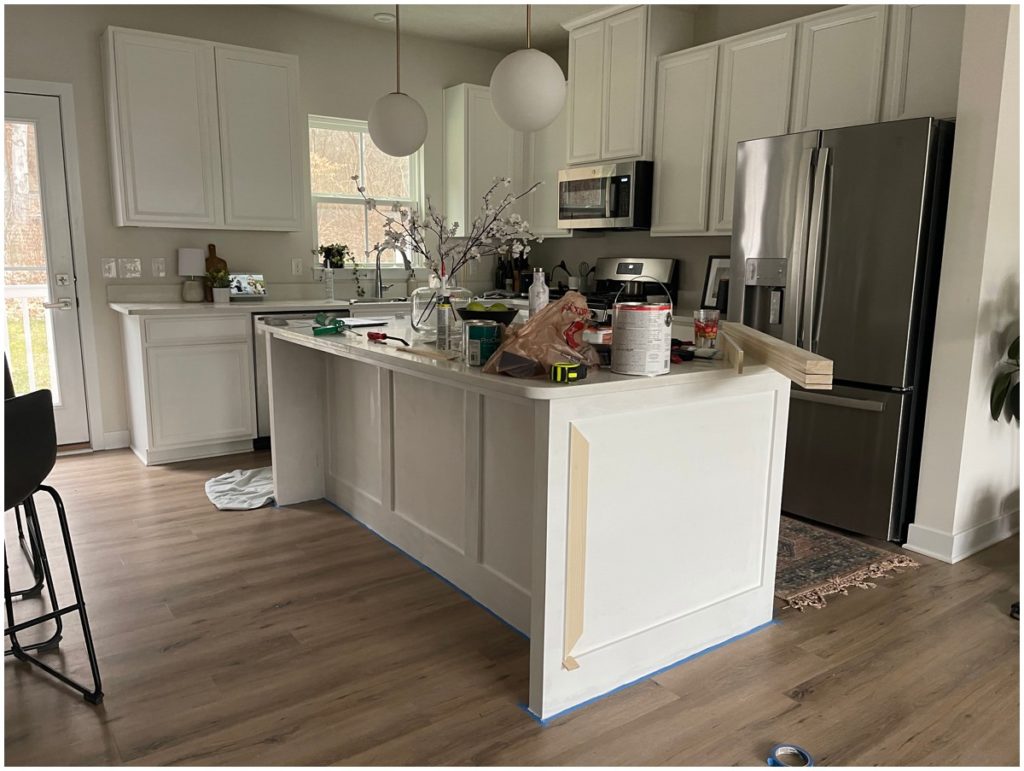
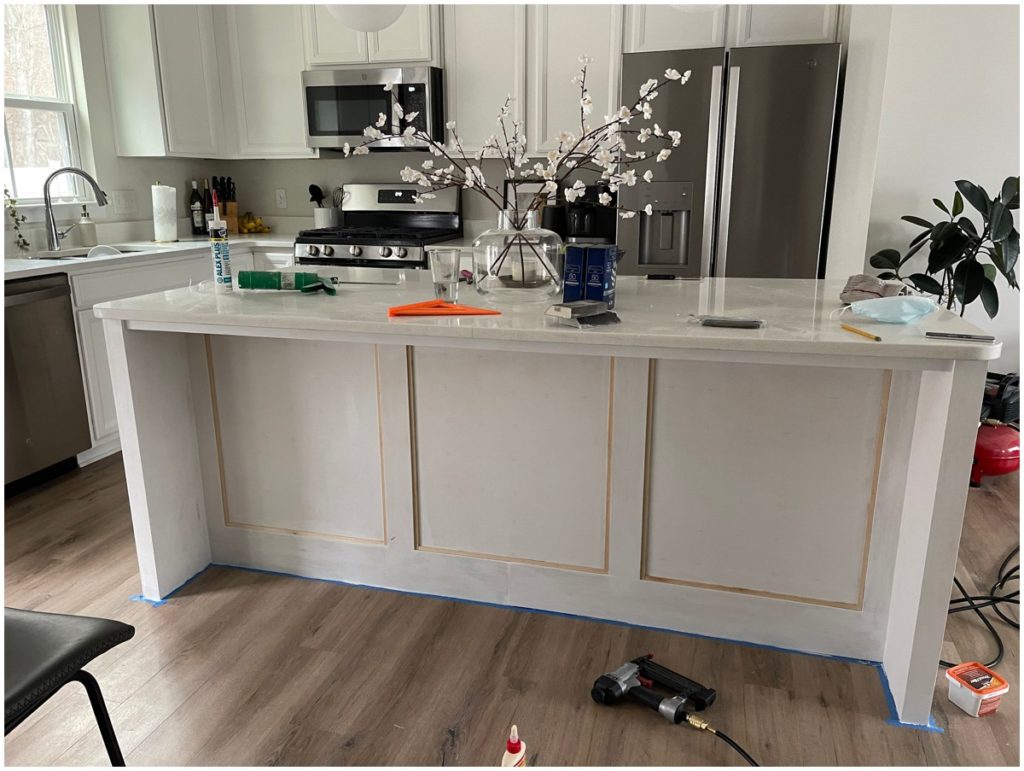
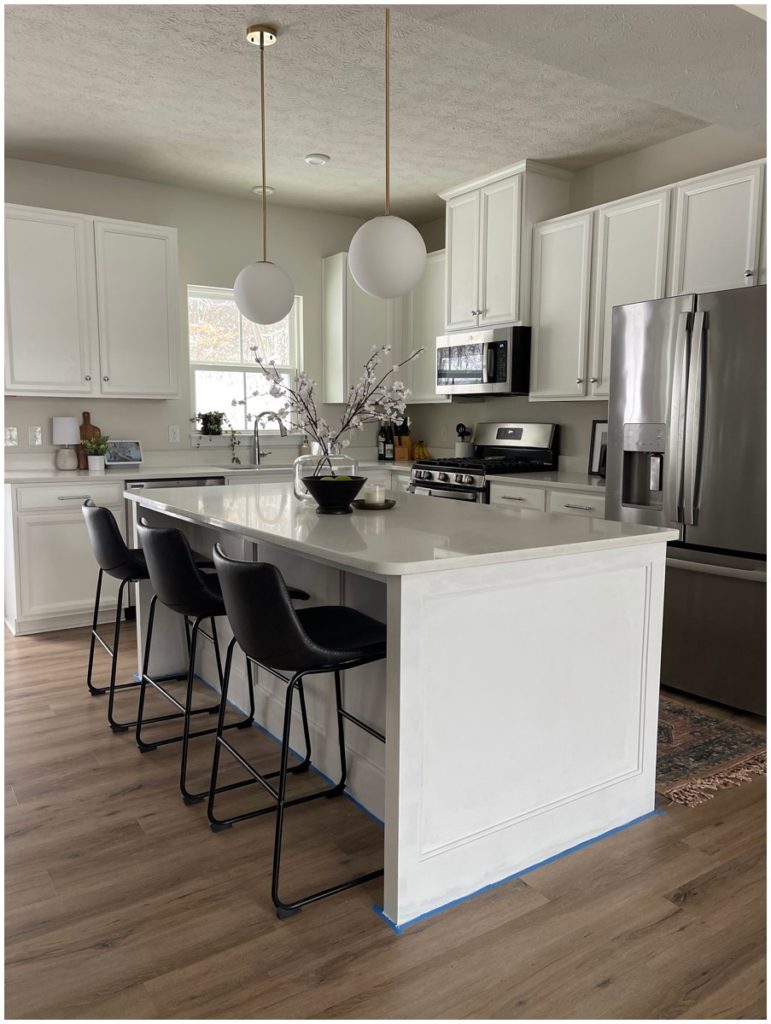
I primed the island twice, then added two coats of Sherwin Williams Satin Extra White paint.
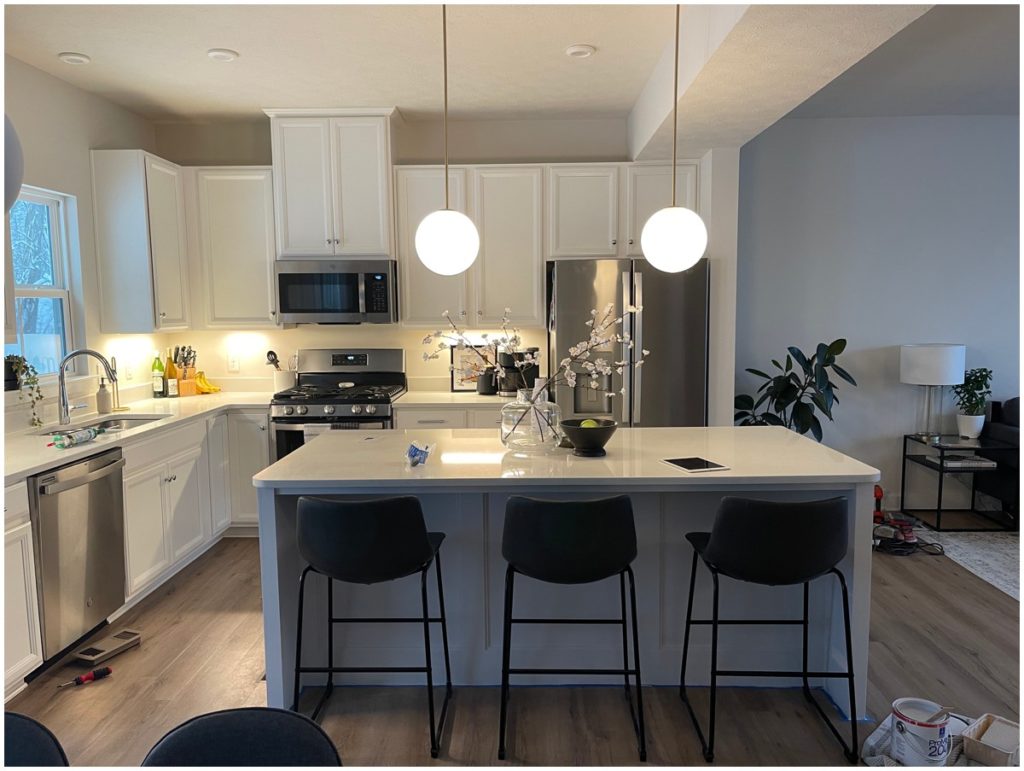
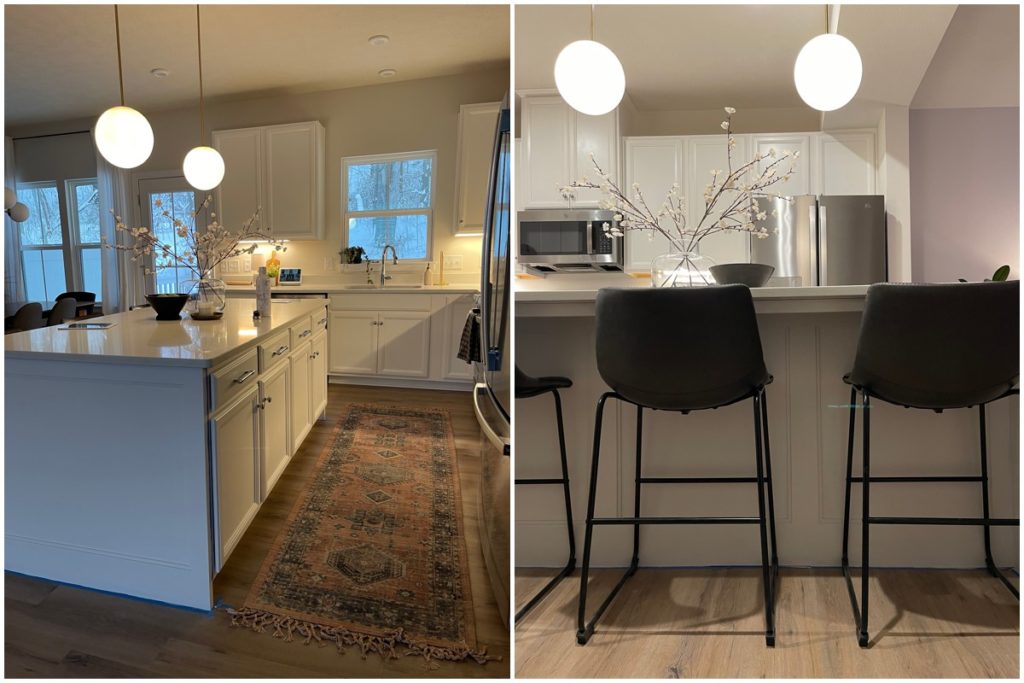
I’m extremely happy with how how DIY kitchen island makeover turned out! Please let me know your thoughts in the comments below! If you would like to see more of our DIY home projects click here!
https://andrewsmithweddings.com/category/personal/our-home/
Andrew
Our DIY Kitchen Island Makeover
January 31, 2022
CLOSE COMMENTS


Hi! Did you take the covering off the back of the island? The part that the corbels connect to. Also? Did you do the wood on top of the floor or did you cut out some flooring to secure to the sub floor? Thank you!
I have a cherry colored island, but my cabinets are white-ish gray. I’m unsure what color I would do this in.
Hello! I did not take the covering off the back island. I just added on top of it after taking the corbels off. I also did not take the flooring off or secure it to the subfloor.
This is beautiful. Do you have any comments on the solid pice that extends into the toe kick section? I’m doing similar work now on my kitchen peninsula and the hubbie is concerned about losing the toe kick space on the end (kids, dogs…high traffic). I prefer the solid piece as opposed to cutting out the toe kick. Curious how you feel about it after living with it some time. Thanks in advance!
Hi! So won’t lie…I had to look up the term toe kick because I never knew what that was! lol Anyways, I haven’t noticed anything different with closing it off. I at least have a whole lot of space under the cabinets, but the ends haven’t caused me any issues.
Hi! I absolutely LOVE what you did! I’m just curious how thick the poplar boards are that you used to trim/frame out the panels on the island? Wasn’t sure if they were 1” or less. Thanks!
Hi! Thank yo use much! They are 1/2″ thick!
Hi Andrew, do you have any photos showing how you handled the lower corners of the cabinet side of the island where the toe kick interfaces with the new panels on either end?
Hi! I do not, but if you’re wondering how I did them; I didn’t do anything too special for it. It’s just thickness of the layered woods. I/2″ for the trim, 1/4″inch for the backing, and I added another 1/4″ piece just to give it thickness. Just added wood filler and sand them down where they look like one piece.